Android仿微信或支付宝方块密码输入框

在用到支付类或者验证类app时,都有一个简密的输入框。百度了下有个不错的帖子,点击打开链接

不过自己也写了个简单的类似的。

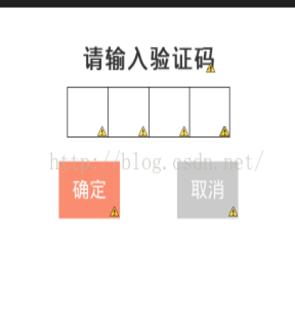
懒得运行,直接截layout.xml的效果图先。

布局文件

?

1

2

3

4

5

6

7

8

9

10

11

12

13

14

15

16

17

18

19

20

21

22

23

24

25

26

27

28

29

30

31

32

33

34

35

36

37

38

39

40

41

42

43

44

45

46

47

48

49

50

51

52

53

54

55

56

57

58

59

60

61

62

63

64

65

66

67

68

69

70

71

72

73

74

75

76

77

78

79

80

81

82

83

84

85

86

87

88

89

90

91

92

93

94

95

96

97

98

99

100

101

102

103

104

105

106

107

108

109

110

<RelativeLayout xmlns:android="http://schemas.android.com/apk/res/android"

android:layout_width="fill_parent"

android:layout_height="wrap_content"

android:background="#ffffff"

android:paddingBottom="20dp"

android:paddingTop="30dp" >

<TextView

android:id="@+id/txtTitle"

android:layout_width="wrap_content"

android:layout_height="wrap_content"

android:layout_centerHorizontal="true"

android:text="请输入验证码"

android:textStyle="bold"

android:textSize="22sp" />

<LinearLayout

android:id="@+id/layout"

android:layout_width="wrap_content"

android:layout_height="wrap_content"

android:layout_below="@+id/txtTitle"

android:layout_centerHorizontal="true"

android:layout_marginTop="10dp"

android:orientation="horizontal" >

<TextView

android:id="@+id/t1"

android:layout_width="wrap_content"

android:layout_height="wrap_content"

android:background="@drawable/i1"

android:gravity="center"

android:inputType="number"

android:lines="1"

android:maxLines="1" />

<TextView

android:id="@+id/t2"

android:layout_width="wrap_content"

android:layout_height="wrap_content"

android:background="@drawable/i1"

android:gravity="center"

android:inputType="number"

android:lines="1"

android:maxLines="1" />

<TextView

android:id="@+id/t3"

android:layout_width="wrap_content"

android:layout_height="wrap_content"

android:background="@drawable/i1"

android:gravity="center"

android:inputType="number"

android:lines="1"

android:maxLines="1" />

<TextView

android:id="@+id/t4"

android:layout_width="wrap_content"

android:layout_height="wrap_content"

android:background="@drawable/i2"

android:gravity="center"

android:inputType="number"

android:lines="1"

android:maxLines="1" />

</LinearLayout>

<EditText

android:id="@+id/editHide"

android:layout_width="wrap_content"

android:layout_height="wrap_content"

android:layout_alignBottom="@+id/layout"

android:layout_alignLeft="@+id/layout"

android:layout_alignRight="@+id/layout"

android:layout_alignTop="@+id/layout"

android:layout_weight="1"

android:background="#00000000"

android:cursorVisible="false"

android:ems="10"

android:inputType="number"

android:maxLength="4"

android:textColor="#00000000" />

<LinearLayout

android:layout_width="wrap_content"

android:layout_height="wrap_content"

android:layout_below="@+id/layout"

android:layout_centerHorizontal="true"

android:layout_marginTop="20dp" >

<Button

android:id="@+id/verifycode_ok"

android:layout_width="wrap_content"

android:layout_height="wrap_content"

android:background="#fa8d70"

android:layout_marginRight="30dp"

android:textColor="#ffffff"

android:text="确定" />

<Button

android:id="@+id/verifycode_cancel"

android:layout_width="wrap_content"

android:layout_height="wrap_content"

android:layout_marginLeft="30dp"

android:background="@color/index_time_but"

android:textColor="#ffffff"

android:text="取消" />

</LinearLayout>

</RelativeLayout>

代码:

?

1

2

3

4

5

6

7

8

9

10

11

12

13

14

15

16

17

18

19

20

21

22

23

24

25

26

27

28

29

30

31

32

33

34

35

36

37

38

39

40

41

42

43

44

45

46

47

48

49

50

51

52

53

54

55

56

57

58

59

60

61

62

63

64

import android.app.Activity;

import android.os.Bundle;

import android.text.Editable;

import android.text.TextWatcher;

import android.widget.EditText;

import android.widget.TextView;

public class MainActivity extends Activity {

TextView t1, t2, t3, t4, et;

String key = "";

@Override

protected void onCreate(Bundle savedInstanceState) {

super.onCreate(savedInstanceState);

setContentView(R.layout.verifycode);

t1 = (TextView) findViewById(R.id.t1);

t2 = (TextView) findViewById(R.id.t2);

t3 = (TextView) findViewById(R.id.t3);

t4 = (TextView) findViewById(R.id.t4);

et = (EditText) findViewById(R.id.editText1);

et.addTextChangedListener(tw);

}

void setKey() {

char[] arr = key.toCharArray();

t1.setText("");

t2.setText("");

t3.setText("");

t4.setText("");

for (int i = 0; i < arr.length; i++) {

if (i == 0) {

t1.setText(String.valueOf(arr[0]));

} else if (i == 1) {

t2.setText(String.valueOf(arr[1]));

} else if (i == 2) {

t3.setText(String.valueOf(arr[2]));

} else if (i == 3) {

t4.setText(String.valueOf(arr[3]));

}

}

}

TextWatcher tw = new TextWatcher() {

@Override

public void onTextChanged(CharSequence s, int start, int before,

int count) {

}

@Override

public void beforeTextChanged(CharSequence s, int start, int count,

int after) {

}

@Override

public void afterTextChanged(Editable s) {

key = s.toString();

setKey();

}

};

}

好哒,就这样了,运行就有效果了。没有什么自定义,没有什么第三方。

当然。如果你要弹窗形式的话,也一样,加下面的就能弹窗了

?

1

2

3

4

5

6

final AlertDialog dialog = new AlertDialog.Builder(mContext).create();

dialog.show();

dialog.getWindow().setContentView(R.layout.verifycode);t1 = (TextView) dialog.findViewById(R.id.t1);

t2 = (TextView) dialog.findViewById(R.id.t2);

t3 = (TextView) dialog.findViewById(R.id.t3);

t4 = (TextView) dialog.findViewById(R.id.t4);

后期有时间再补上项目DOME。

以上就是本文的全部内容,希望对大家的学习有所帮助,也希望大家多多支持服务器之家。

原文链接:https://blog.csdn.net/yaya_soft/article/details/44307847

本文链接:https://my.lmcjl.com/post/10551.html

展开阅读全文

4 评论

留下您的评论.