一、项目介绍
【知识准备】
①Android Interface definition language(aidl,android接口定义语言),其目的实现跨进程的调用。进程是程序在os中执行的载体,一个程序对应一个进程,不同进程就是指不同程序,aidl实现不同程序之间的调用。
②主线程与子线程通信使用handler,handler可以在子线程中发出消息,在主线程处理消息,从而完成线程之间的通信,即使有多个线程,仍然是一个程序。
③不同程序之间需要通过aidl通信,通信方式可以有多种,aidl是其中一种。实现的结果就像自己的程序调用自己的其他方法一样,感觉就像一个程序。
④业务场景:例如购物app需要支付,购物app是淘宝,支付app是支付宝。所以就需要不同的程序进行通信。
二、首先介绍一个App之间的Service和Activity之间的通信
【项目结构】

【MyService】
【提示】
①创建Service

②如果不是通过上述方法创建,一定要记得注册
?
|
1 2 3 4 5 6 |
|
【代码】
?
|
1 2 3 4 5 6 7 8 9 10 11 12 13 14 15 16 17 18 19 20 21 22 23 24 25 26 |
|
【layout_main】
添加按钮,点击便于调用
?
|
1 2 3 4 5 6 |
|
【MainActivity】
?
|
1 2 3 4 5 6 7 8 9 10 11 12 13 14 15 16 17 18 19 20 21 22 23 24 25 26 27 28 29 30 31 32 33 34 35 36 |
|
【效果】

点击后输出service中pay方法中的内容

三、两个App之间的Service通信
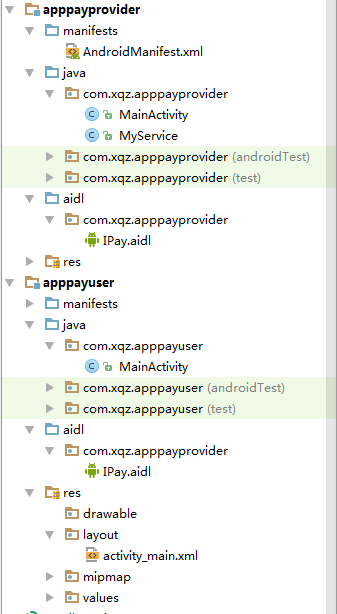
【项目结构】
【步骤】
①在AppPayProvider中创建MyService
代码同上
【注册】
Ⅰ、注册时(android:enabled="true" android:exported="true" )设置为true,将Service暴露出去,另一个App才能访问到它
Ⅱ、添加『 <intent-filter> 』。由于不是同一个App,通过intent-filter对Intent进行过滤,让另一个app通过action开启服务
?
|
1 2 3 4 5 6 7 8 9 10 |
|
②MainActivity和layout_main保留创建时不作任何修改,但也不要删掉,因为安装程序必须提供起始页面,否则将会出错
③在AppPayProvider中添加AIDL
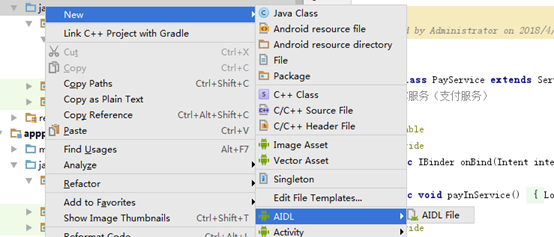
【代码】


【提示】接口中定义中方法要和Service中的MyBinder中的方法一致
④再创建好AIDL,添加完方法后,android studio需要对这个aidl进行编译,会自动按aidl规范生成一个Binder子类的代码。

⑤对MyService中的MyBinder进行修改

【提示】继承IPay.Stub。在这之前必须Make Project,否则将没有只能联想
⑥创建AppPayUser对AppPayProvider中的MyService进行操作
【layout-main】
?
|
1 2 3 4 5 |
|
⑦将AppPayProvider中AIDL拷贝到AppPayUser中
【提示】Ⅰ、包名要相同,按目录位置复制,通过下述方法,直接在文件夹进行复制。『此处可以查看项目结构,可以看到包名是相同的』
Ⅱ、同样拷贝过来后需要Make Project

⑧【AppPayUser-MainActivity】
?
|
1 2 3 4 5 6 7 8 9 10 11 12 13 14 15 16 17 18 19 20 21 22 23 24 25 26 27 28 29 30 31 32 33 34 35 36 37 38 39 40 41 42 43 44 45 46 47 |
|
【安装】
先安装AppPayProvider再安装AppPayUser。
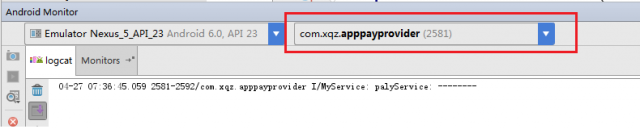
【效果】
将run中的 视图调到AppPayProvider,点击模拟器AppPayUser中的pay按钮,将会执行AppPayProvider中MyService中pay方法中的内容。
四、总结
【跨App和同App之间的区别】
①跨App开启服务是提供服务的App需要设置intent-filter过滤器,控制服务的App需要通过。setAction和setPackage方法进行设置action和包名,才能开启服务。而同App只需要指定启动的service就可。
②跨App的MyBinder实例要通过AIDL获取,两个应用定义同样的接口的方法,通过对应的AIDL名称.Stub.asInterface方法得到binder实例,然后就和同App的myBinder使用么有区别了。
③跨App的MyBinder对象的使用必须捕获异常,而同App不需要。
④可以根据上方简单的例子实现很多类似的功能。
以上就是本文的全部内容,希望对大家的学习有所帮助,也希望大家多多支持服务器之家。
原文链接:http://www.cnblogs.com/xqz0618/p/aidl_service.html
本文链接:https://my.lmcjl.com/post/17560.html
4 评论