最近在研究利用深度学习对气象数据进行降尺度的方法,偶然发现这一篇论文及其提及到的规范化降尺度库,便安装以供实验。
GitHub - carlos-gg/dl4ds: Deep Learning for empirical DownScaling. Python package with state-of-the-art and novel deep learning algorithms for empirical/statistical downscaling of gridded data
安装
作者给出的库安装看似十分简单,那我们就创建一个虚拟环境然后运行下面这行命令。
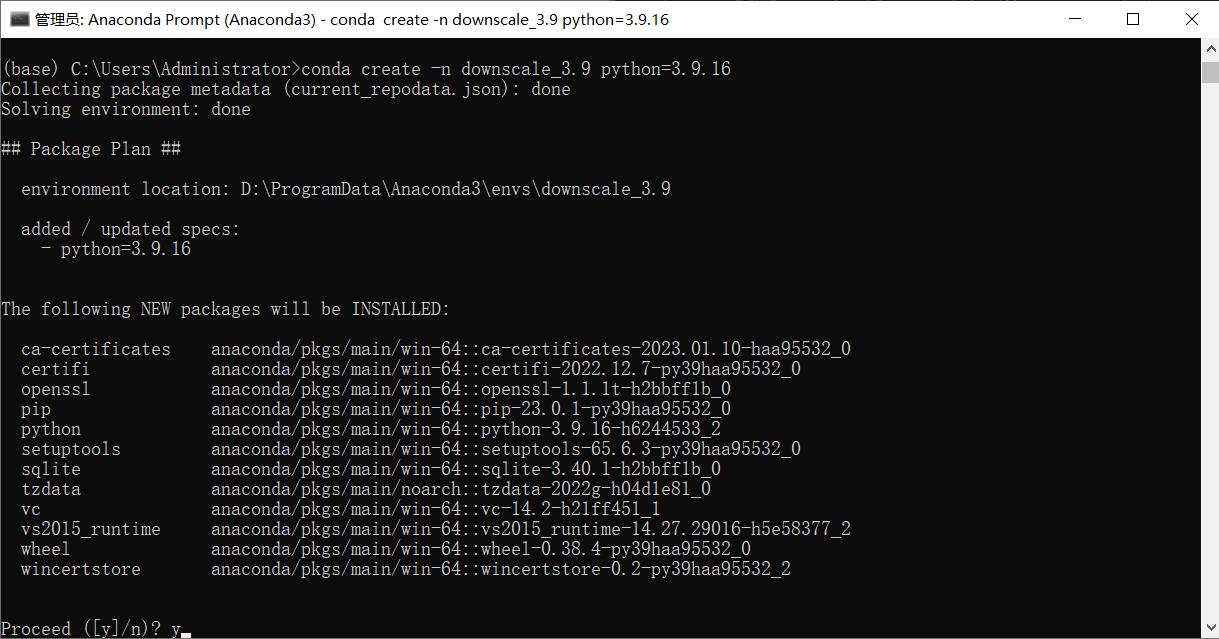
pip install dl4ds创建一个新的conda环境
conda create -n downscale_3.9 python=3.9.16
activate downscale_3.9
pip install dl4ds
出错了,cartopy版本不对,那就用下面的命令先把cartopy库装好
conda install cartopy顺利安装
再执行一次pip install dl4ds之后看似安装完成
可实际上tensorflow的版本自动帮我们安装了最新的2.11.0,我们的电脑只能适配2.6.0版本的tensorflow,所以需要手动降级tensorflow版本并把其他依赖项(如numpy,sklearn)也调整至相应版本。一步一步调太麻烦了,所以我决定从根源入手,在安装的时候就把所有依赖项安装至对应版本。如何在setup.py里更改依赖项的版本呢?接下来轮到我们的ChatGPT登场。
ChatGPT
# !/usr/bin/env pythonimport os
import re
from setuptools import setupdef resource(*args):return os.path.join(os.path.abspath(os.path.join(__file__, os.pardir)),*args)with open(resource('dl4ds', '__init__.py')) as version_file:version_file = version_file.read()VERSION = re.search(r"""^__version__ = ['"]([^'"]*)['"]""",version_file, re.M)VERSION = VERSION.group(1)with open(resource('README.md')) as readme_file:README = readme_file.read()setup(name='dl4ds',packages=['dl4ds','dl4ds.models','dl4ds.training'],version=VERSION,description='Deep Learning for empirical DownScaling',long_description=README,long_description_content_type='text/markdown',author='Carlos Alberto Gomez Gonzalez',license='Apache v2.0',author_email='carlos.gomez@bsc.es',url='https://github.com/carlgogo/dl4ds',keywords=['deep learning', 'downscaling', 'super-resolution', 'neural networks','Earth data','EO' ],install_requires=['numpy','scipy','matplotlib','xarray','ecubevis','tensorflow','sklearn','opencv-python','joblib','seaborn','absl-py'],extras_require={'horovod':['horovod'] },classifiers=['Intended Audience :: Science/Research','Operating System :: POSIX :: Linux','Natural Language :: English','License :: OSI Approved :: Apache Software License','Programming Language :: Python','Programming Language :: Python :: 3','Programming Language :: Python :: 3.7','Topic :: Scientific/Engineering',],
)
这是setup.py,把这段代码告诉ai,然后:

好的,基于 tensorflow==2.6.0 版本,以下是一组建议的依赖项和版本:
install_requires=['numpy==1.19.5','scipy==1.7.1','matplotlib==3.4.3','xarray==0.19.0','ecubevis==1.1.0','tensorflow==2.6.0','scikit-learn==1.0','opencv-python-headless==4.5.4.58','joblib==1.1.1','seaborn==0.11.2','absl-py==0.14.1'
]
这里的版本组合是根据TensorFlow 2.6.0的要求和常见的依赖项版本兼容性进行了选择。请注意,这些版本号是基于当前时间截至2023年3月14日。如果您在将来使用此代码,请注意检查每个依赖项的最新版本和版本兼容性。
另外,如果您使用GPU版本的TensorFlow,您需要根据您的CUDA和cuDNN版本选择适当的TensorFlow版本。可以在TensorFlow官方文档中找到TensorFlow版本和CUDA/cuDNN版本的兼容性矩阵。
死马当活马医,我们还是来试试吧。

测试
import numpy as np
import xarray as xr
import ecubevis as ecv
import dl4ds as dds
import scipy as sp
import netCDF4 as nc
import climetlab as cml
import tensorflow as tf
from tensorflow import keras
from tensorflow.keras import modelsprint(tf.__version__)
tf.test.is_gpu_available()
2.6.0
True安装完毕
本文链接:https://my.lmcjl.com/post/6865.html

4 评论