一、基本概念
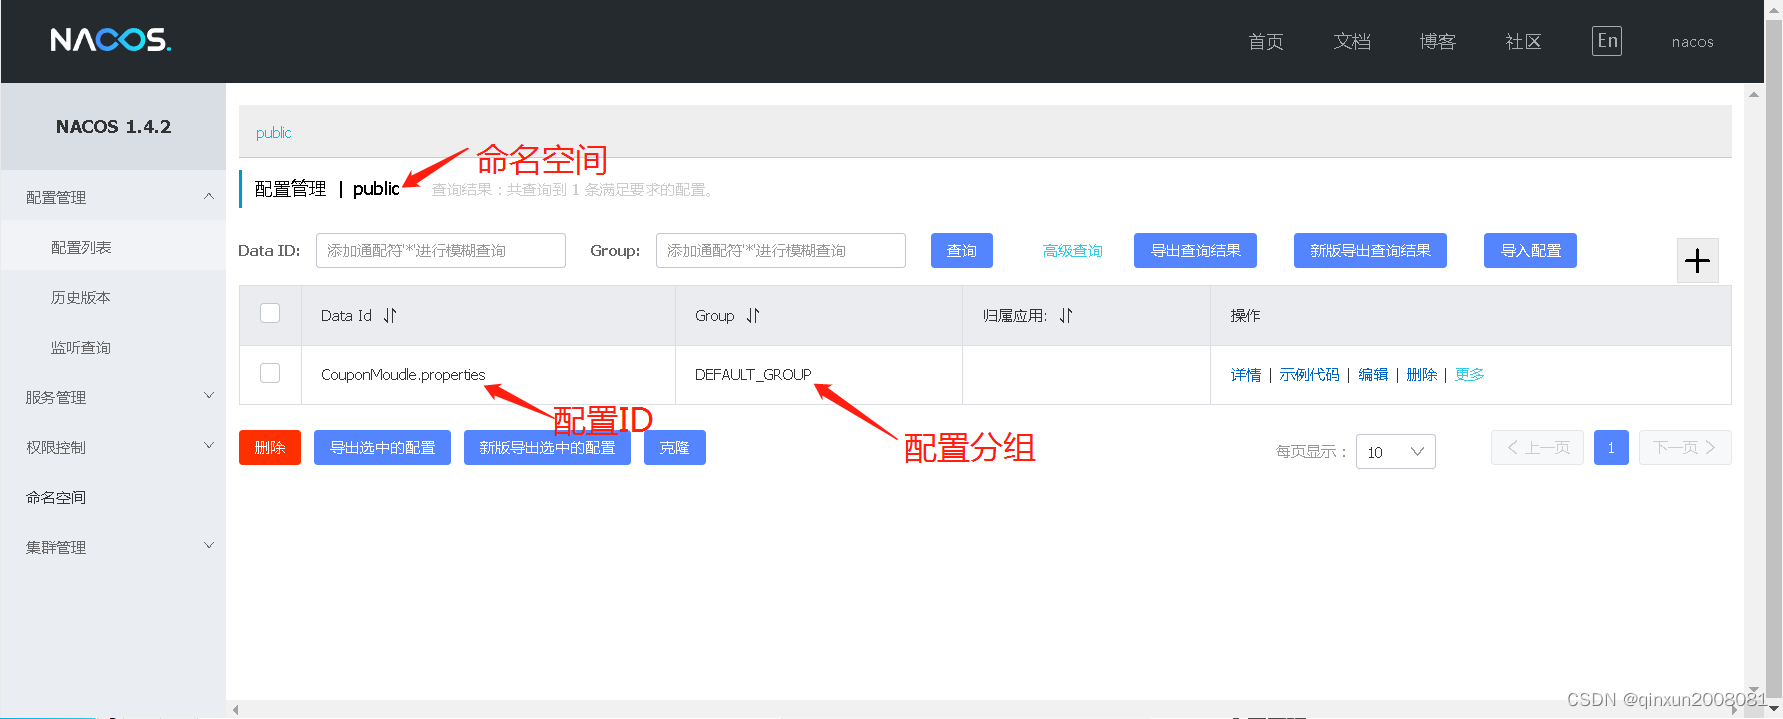
1.命名空间
用于区分环境,开发、测试、生产环境等。
2.配置分组
多个配置文件放在一起,形成组。
3.配置集
一般指一个配置文件
4.配置集ID
这个配置文件全局唯一ID
5.配置项
配置的键值对
二、引入Nacos配置中心
我们在用户模块中实现我们的配置中心
1.引入nacos-config依赖
<!--nacos config-->
<dependency><groupId>com.alibaba.cloud</groupId><artifactId>spring-cloud-starter-alibaba-nacos-config</artifactId>
</dependency>
2.配置文件
我们新建一个配置文件bootstrap.yml,和SpringCloud Conig类似,我们必需要在 bootstrap.yml配置文件中进行配置,在application.yml中无效,bootstrap.yml优先级高于application.yml,配置如下:
spring:application:name: user-service #应用名称profiles:active: dev #当前环境cloud:nacos:config:enabled: true # 如果不想使用 Nacos 进行配置管理,设置为 false 即可server-addr: 127.0.0.1:8848 # Nacos Server 地址group: DEFAULT_GROUP # 组,默认为 DEFAULT_GROUPfile-extension: yaml # 配置内容的数据格式,默认为 properties3.Nacos Server创建配置
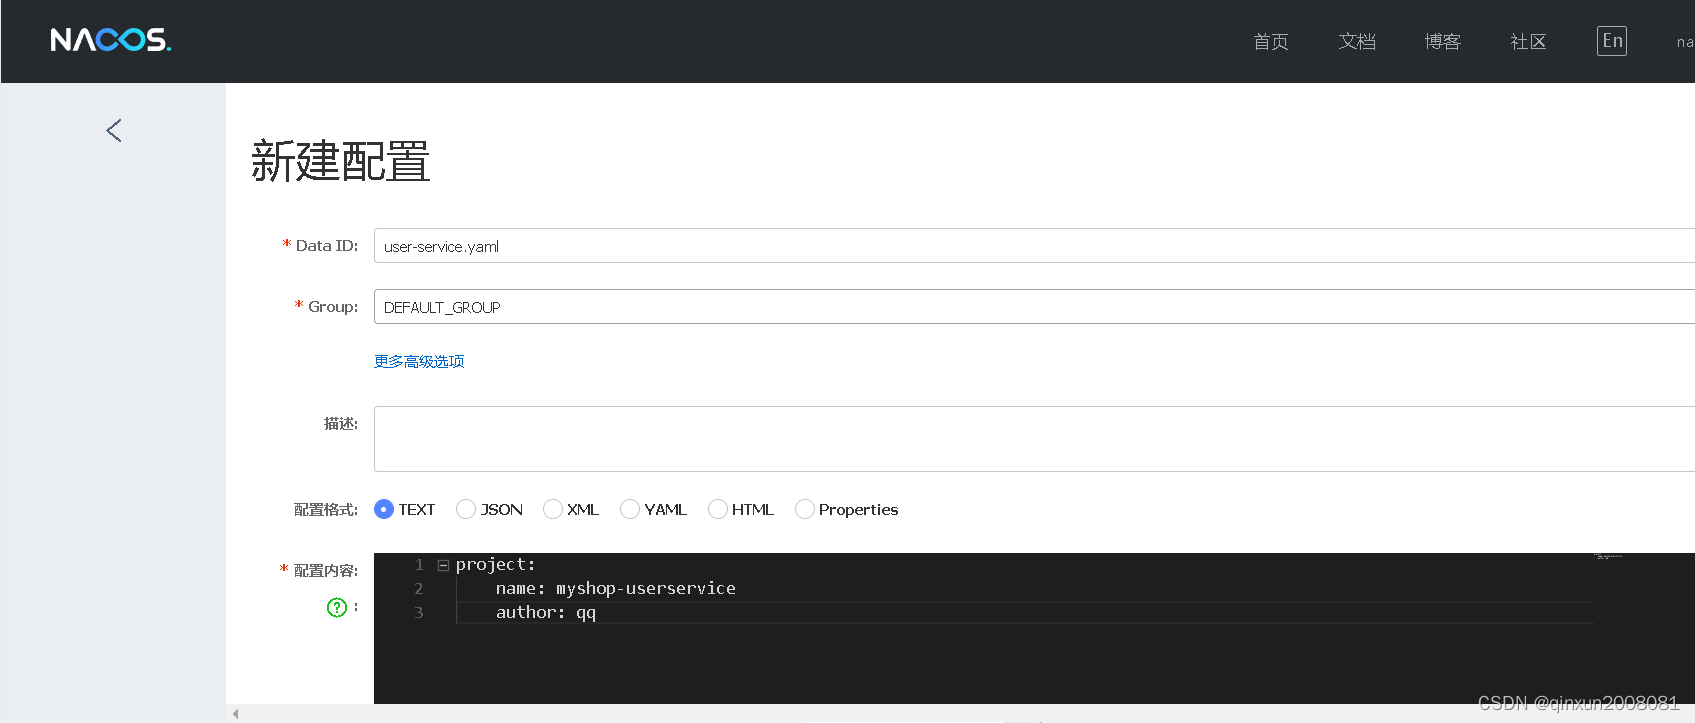
我们在Nocos的配置管理中添加一个配置,Data ID为user-service.yaml,组使用系统默认分组
4.控制层测试
通过@Value获取配置信息,使用@RefreshScope注解实现配置自动更新
package com.example.myshop.controller;import org.springframework.beans.factory.annotation.Value;
import org.springframework.cloud.context.config.annotation.RefreshScope;
import org.springframework.web.bind.annotation.GetMapping;
import org.springframework.web.bind.annotation.RequestMapping;
import org.springframework.web.bind.annotation.RestController;import java.util.HashMap;
import java.util.Map;/*** @author qx* @date 2023/06/23* @desc nacos配置测试*/
@RestController
@RequestMapping("/user")
@RefreshScope
public class NacosConfigController {@Value("${project.name:}")private String projectName;@Value("${project.author:}")private String author;@GetMapping("/config")public Map<String, Object> getConfig() {Map<String, Object> configMap = new HashMap<>();configMap.put("projectName", projectName);configMap.put("projectAuthor", author);return configMap;}
}
5.测试
启动user模块。
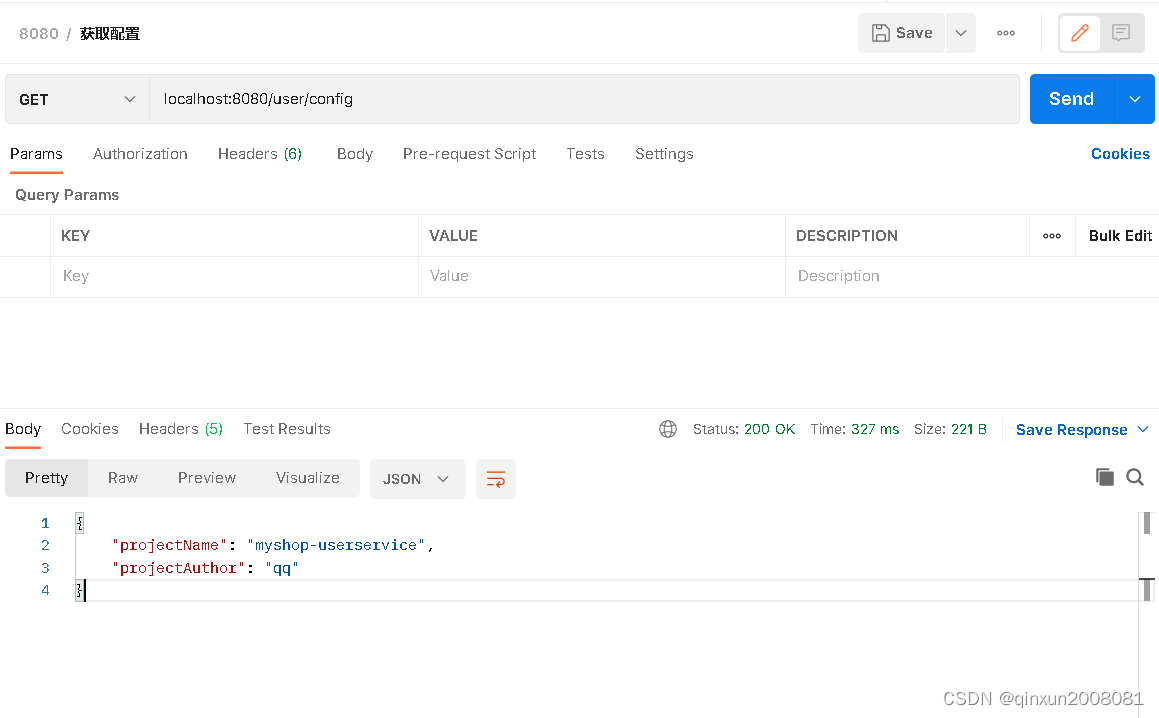
我们在Nacos控制台修改配置项,并发布。 可以看到控制台打印输出了配置修改的信息
2023-06-23 10:48:52.258  INFO 9436 --- [-127.0.0.1_8848] o.s.c.e.event.RefreshEventListener       : Refresh keys changed: [project.author]
2023-06-23 10:48:52.258  INFO 9436 --- [-127.0.0.1_8848] c.a.nacos.client.config.impl.CacheData   : [fixed-127.0.0.1_8848] [notify-ok] dataId=user-service.yaml, group=DEFAULT_GROUP, md5=a6172172fee5eccfce73aa3366cf10df, listener=com.alibaba.cloud.nacos.refresh.NacosContextRefresher$1@a294503
2023-06-23 10:48:52.258  INFO 9436 --- [-127.0.0.1_8848] c.a.nacos.client.config.impl.CacheData   : [fixed-127.0.0.1_8848] [notify-listener] time cost=717ms in ClientWorker, dataId=user-service.yaml, group=DEFAULT_GROUP, md5=a6172172fee5eccfce73aa3366cf10df, listener=com.alibaba.cloud.nacos.refresh.NacosContextRefresher$1@a294503
我们再次访问配置接口:
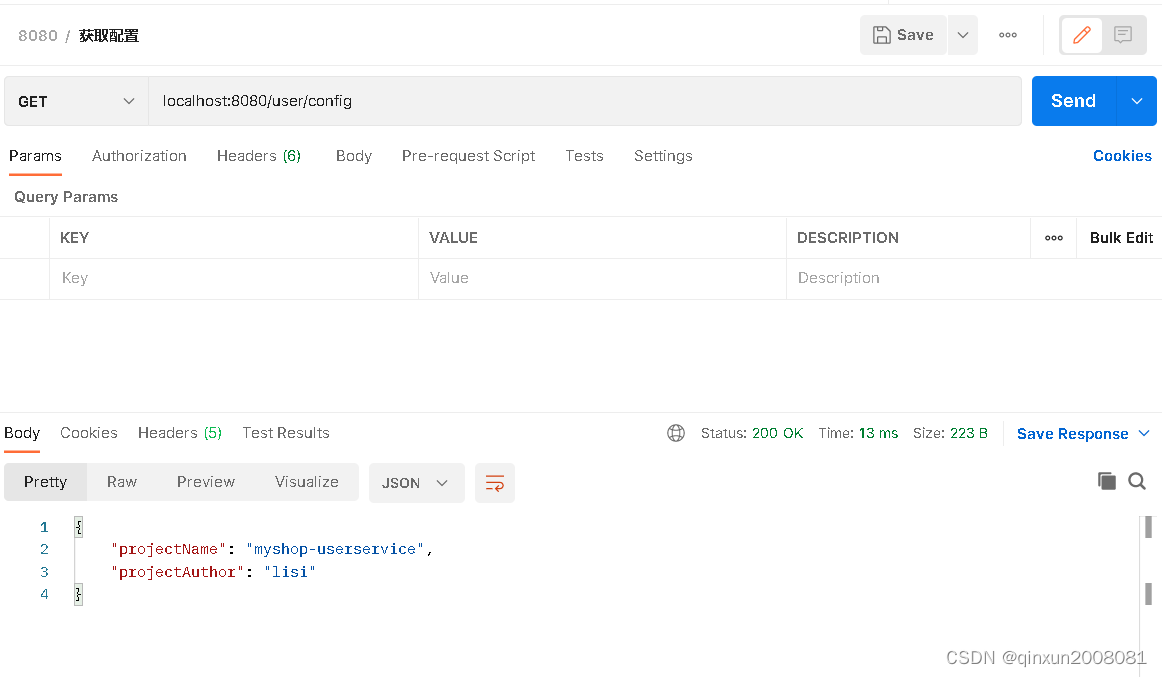
我们成功读取到了Nacos配置中心的配置。
三、集中配置
1.新建命名空间
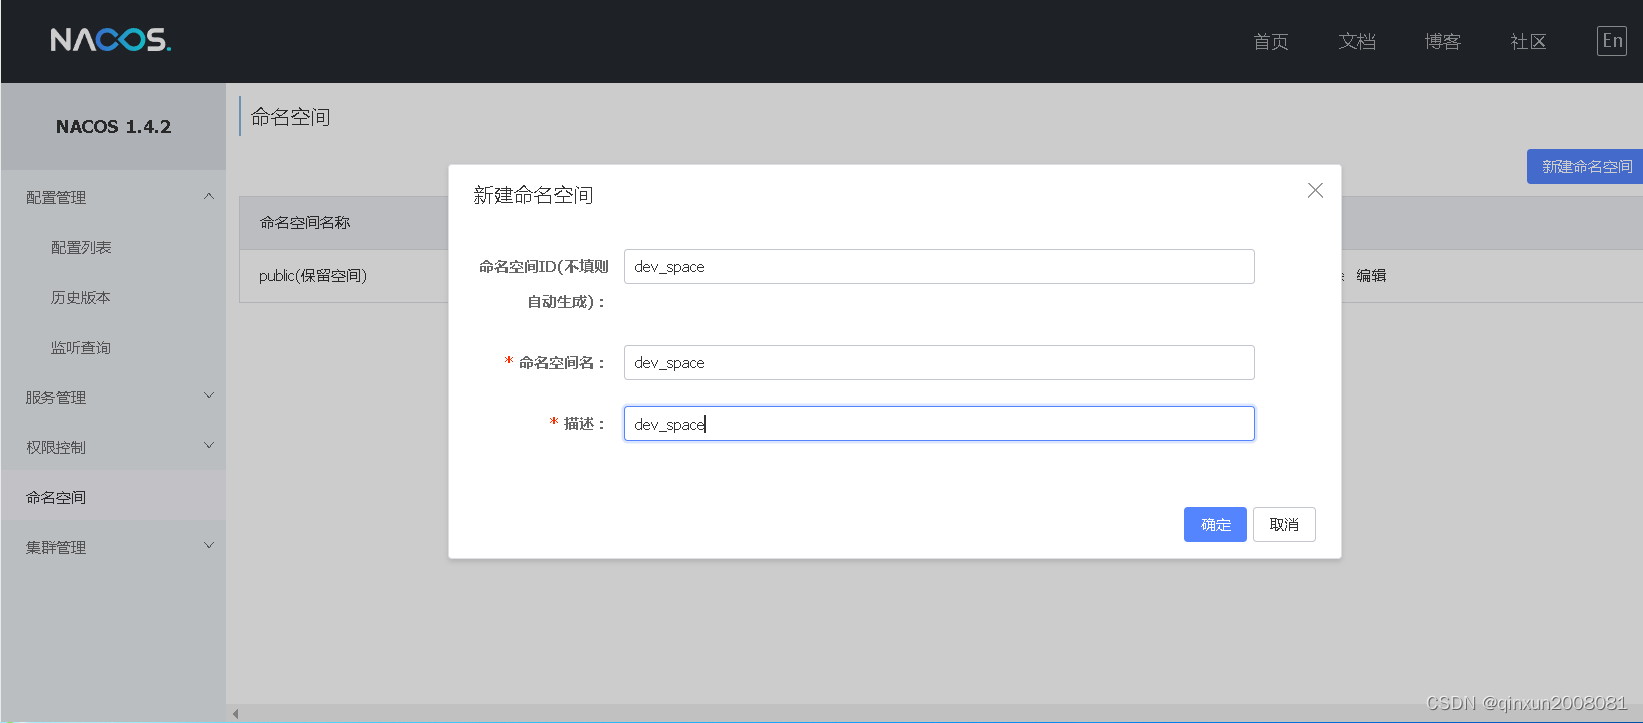
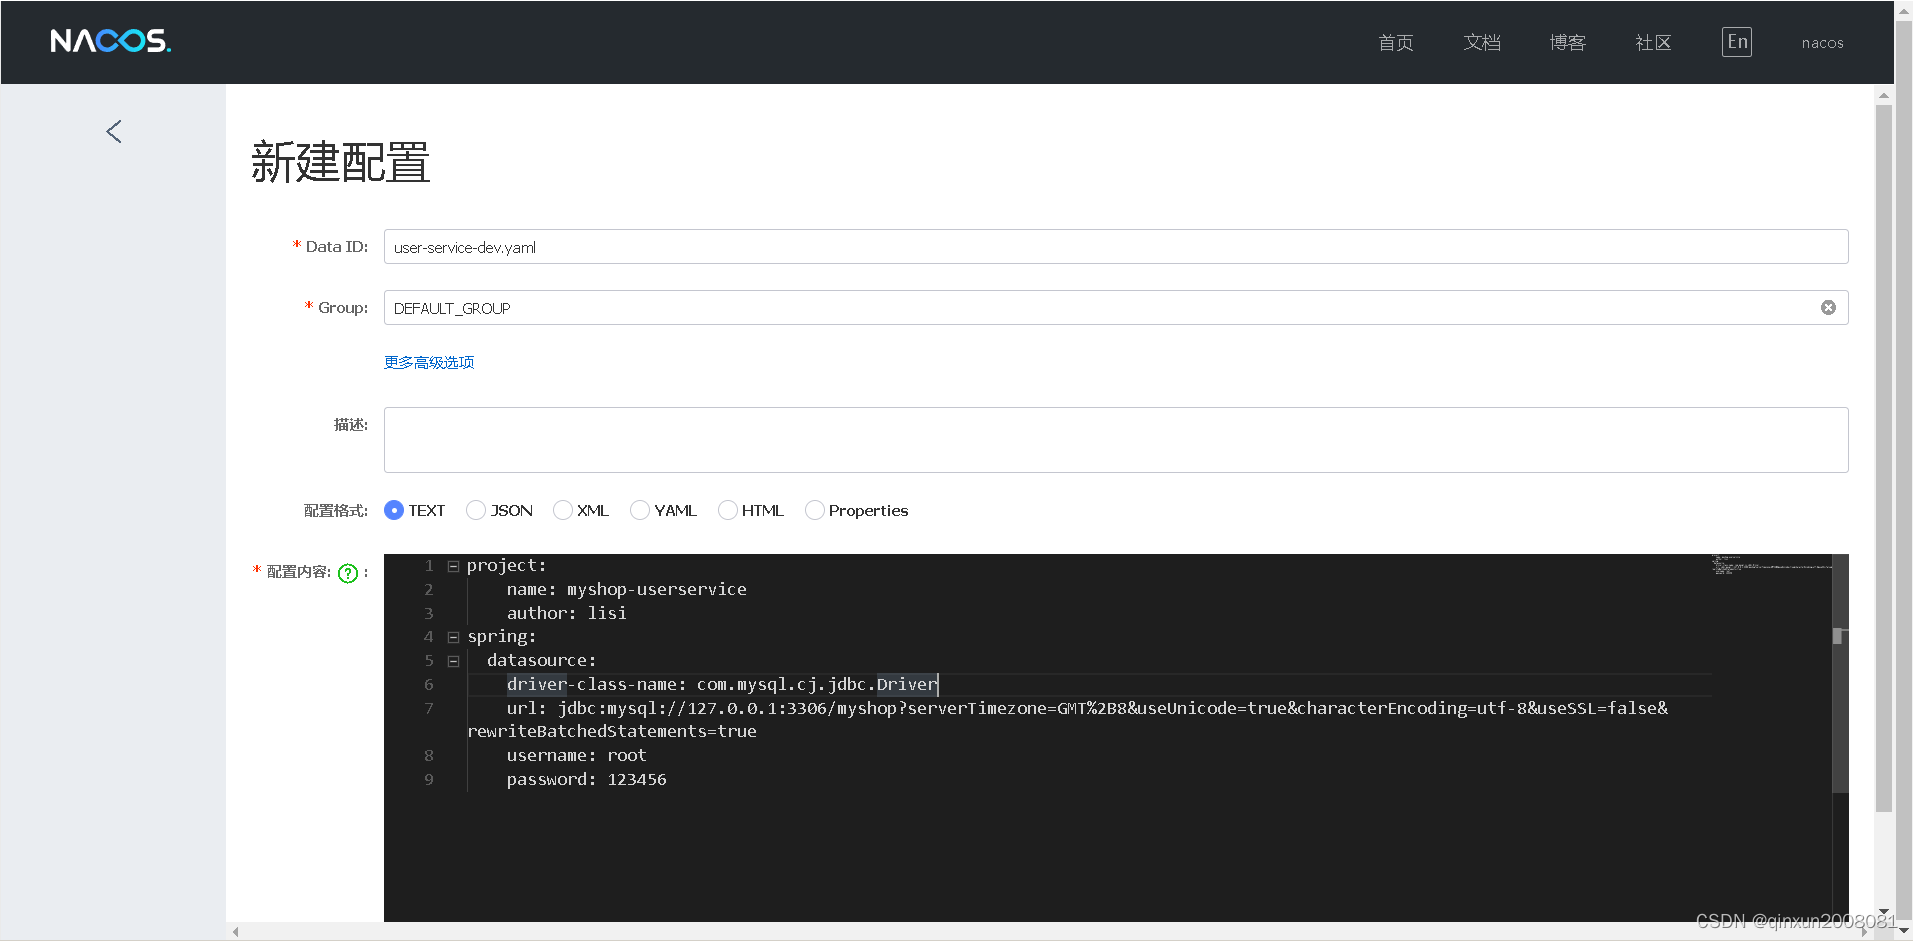
2.创建数据源配置
我们在刚才新建的命名空间下新建一个配置user-service-dev.yaml


3.修改项目配置
指定刚才新建的命名空间名称namespace
spring:application:name: user-service #应用名称profiles:active: dev #当前环境cloud:nacos:config:enabled: true # 如果不想使用 Nacos 进行配置管理,设置为 false 即可server-addr: 127.0.0.1:8848 # Nacos Server 地址group: DEFAULT_GROUP # 组,默认为 DEFAULT_GROUPfile-extension: yaml # 配置内容的数据格式,默认为 propertiesnamespace: dev_space #指定命名空间 默认为public并且注销配置文件中的相关数据库配置
spring:
#  datasource:
#    driver-class-name: com.mysql.cj.jdbc.Driver
#    url: jdbc:mysql://127.0.0.1:3306/myshop?serverTimezone=GMT%2B8&useUnicode=true&characterEncoding=utf-8&useSSL=false&rewriteBatchedStatements=true
#    username: root
#    password: 123456jpa:hibernate:ddl-auto: updateshow-sql: true
4.测试
控制器的示例代码如下:
package com.example.myshop.controller;import com.example.myshop.common.CommonResult;
import com.example.myshop.entity.User;
import com.example.myshop.service.UserService;
import org.springframework.beans.factory.annotation.Autowired;
import org.springframework.web.bind.annotation.*;/*** @author qx* @date 2023/06/21* @desc 用户控制层*/
@RestController
@RequestMapping("/user")
public class UserController {@Autowiredprivate UserService userService;/*** 添加用户*/@PostMapping("/add")public CommonResult addUser(@RequestBody User user) {userService.saveUser(user);return CommonResult.success();}/*** 根据id获取用户信息** @param id 用户ID* @return 用户信息*/@GetMapping("/{id}")public CommonResult getUserById(@PathVariable Long id) {return CommonResult.success(userService.getUserById(id));}}
我们重新启动项目测试
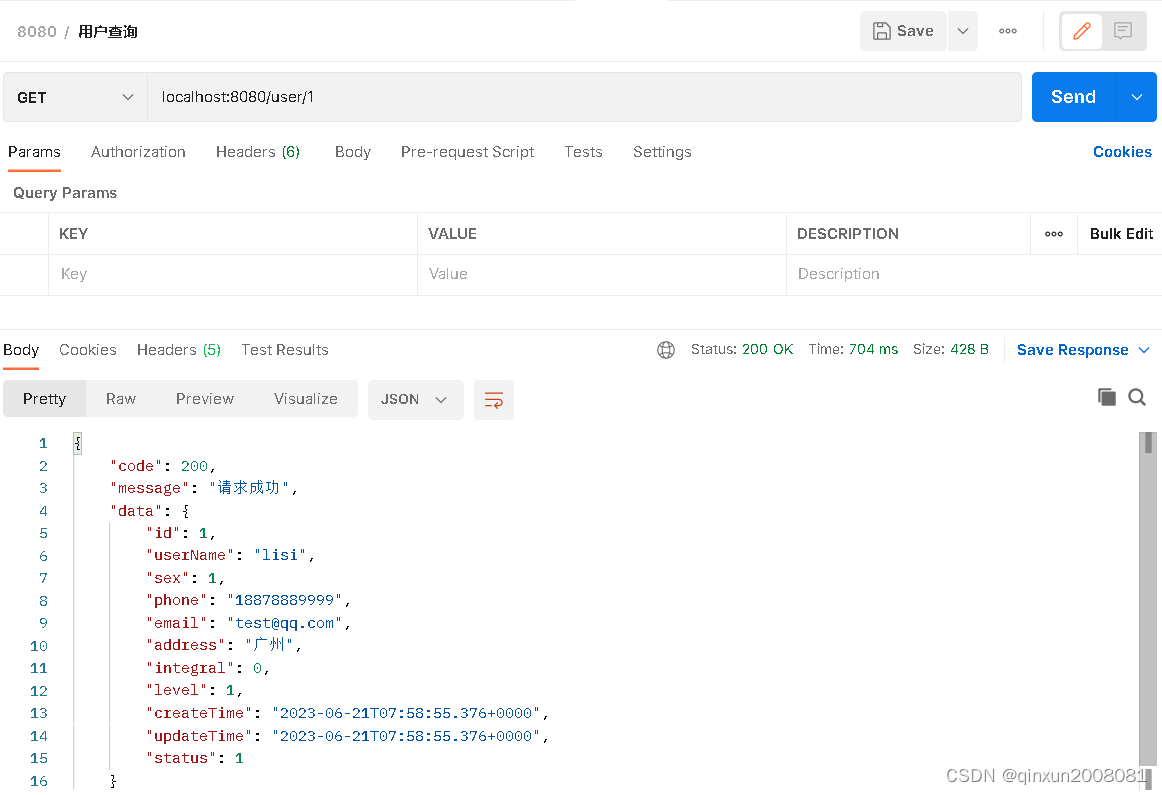
获取到了预期的结果,测试了Nacos做为配置中心的功能。
本文链接:https://my.lmcjl.com/post/8300.html
展开阅读全文

4 评论