Nginx反向代理及负载均衡如何实现(基于linux)

这里来试验下nginx的反向代理。

反向代理(Reverse Proxy)方式是指以代理服务器来接受internet上的连接请求,然后将请求转发给内部网络上的服务器,并将从服务器上得到的结果返回给internet上请求连接的客户端,此时代理服务器对外就表现为一个反向代理服务器。

在我们的java项目中的体现就是,通过80端口访问,Nginx接收到,然后进行转发给tomcat服务器,再将服务器的结果给返回。

这里需要修改nginx.conf文件。

?

1

2

3

4

5

upstream backend {

#代理的IP weight权重大的,接收的访问量就大,反之

server localhost:8084 weight=50;

server localhost:8088 weight=50;

}

将接收的请求进行转发:

?

1

2

3

4

5

6

# / 所有做负载均衡 + 反向代理

location / {

root /data/wwwroot1;

index index.html index.htm;#索引文件

proxy_pass http://backend;

}

这样,通过请求nginx的请求,就可以被分配转发到tomcat上去。这里我是定义了两台tomcat服务器,同时用来做负载均衡的处理。通过设置weight,可以控制访问量。

具体配置代码如下;

?

1

2

3

4

5

6

7

8

9

10

11

12

13

14

15

16

17

18

19

20

21

22

23

24

25

26

27

28

29

30

31

32

33

34

35

36

37

38

39

40

41

42

43

44

45

46

47

48

49

50

51

52

53

54

55

56

57

58

59

60

61

62

63

64

65

66

67

68

69

70

71

72

73

74

75

76

77

78

79

80

81

82

83

84

85

86

87

88

89

90

91

92

93

94

95

96

97

98

99

100

101

102

103

104

105

106

107

108

109

110

111

112

113

114

115

116

117

118

119

120

121

122

123

124

125

126

127

128

129

130

131

132

133

134

135

136

137

138

139

140

141

142

143

144

145

#user nobody;

# worker 工作进程 一般设置 CPU数 * 核数

worker_processes 1;

#error_log logs/error.log;

#error_log logs/error.log notice;

#error_log logs/error.log info;

#pid logs/nginx.pid;

# 设置连接特性

events {

worker_connections 1024;#1个worker产生多少个连接数

}

# 配置HTTP服务器的主要段

http {

include mime.types;

default_type application/octet-stream;

log_format main '$remote_addr - $remote_user [$time_local] "$request" '

# '$status $body_bytes_sent "$http_referer" '

# '"$http_user_agent" "$http_x_forwarded_for"';

#access_log logs/access.log main;

sendfile on;

#tcp_nopush on;

#keepalive_timeout 0;

keepalive_timeout 65;

#gzip压缩功能设置

gzip on;

gzip_min_length 1k;

gzip_buffers 4 16k;

gzip_http_version 1.0;

gzip_comp_level 6;

gzip_types text/plain text/css text/javascript application/json application/javascript application/x-javascript application/xml;

gzip_vary on;

#设定负载均衡后台服务器列表

upstream backend {

#代理的IP weight权重大的,接收的访问量就大,反之

server localhost:8084 weight=50;

server localhost:8088 weight=50;

}

server {

listen 2022;

server_name localhost;

charset utf-8;

access_log logs/wwwroot2.access.log main;

location / {

root /data/wwwroot2;

index index.html index.htm;#索引文件

}

}

# 虚拟主机段

server {

listen 80;

server_name localhost;

root /data/wwwroot1;

charset utf-8;

#访问日志

access_log logs/wwwroot1.access.log main;

# / 所有做负载均衡 + 反向代理

location / {

root /data/wwwroot1;

index index.html index.htm;#索引文件

proxy_pass http://backend;

}

error_page 404 /404.html;

# redirect server error pages to the static page /50x.html

#

error_page 500 502 503 504 /50x.html;

location = /50x.html {

root html;

}

# proxy the PHP scripts to Apache listening on 127.0.0.1:80

#

#location ~ \.php$ {

# proxy_pass http://127.0.0.1;

#}

# pass the PHP scripts to FastCGI server listening on 127.0.0.1:9000

#

#location ~ \.php$ {

# root html;

# fastcgi_pass 127.0.0.1:9000;

# fastcgi_index index.php;

# fastcgi_param SCRIPT_FILENAME /scripts$fastcgi_script_name;

# include fastcgi_params;

#}

# deny access to .htaccess files, if Apache's document root

# concurs with nginx's one

#

#location ~ /\.ht {

# deny all;

#}

}

# another virtual host using mix of IP-, name-, and port-based configuration

#

#server {

# listen 8000;

# listen somename:8080;

# server_name somename alias another.alias;

# location / {

# root html;

# index index.html index.htm;

# }

#}

# HTTPS server

#

#server {

# listen 443 ssl;

# server_name localhost;

# ssl_certificate cert.pem;

# ssl_certificate_key cert.key;

# ssl_session_cache shared:SSL:1m;

# ssl_session_timeout 5m;

# ssl_ciphers HIGH:!aNULL:!MD5;

# ssl_prefer_server_ciphers on;

# location / {

# root html;

# index index.html index.htm;

# }

#}

}

 测试结果发现,通过访问80端口的地址,展现的结果是基本五五开的。
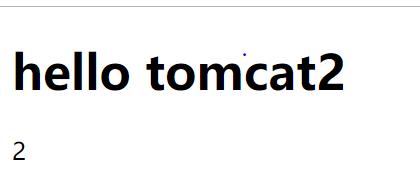
还会随机访问到

以上两个截图,分别对应了我的两个tomcat服务器下的测试文件。

以上就是本文的全部内容,希望对大家的学习有所帮助,也希望大家多多支持服务器之家。

原文链接:https://www.cnblogs.com/sunxun/p/9965181.html

本文链接:https://my.lmcjl.com/post/5340.html

展开阅读全文

4 评论

留下您的评论.